Monday, February 23, 2015

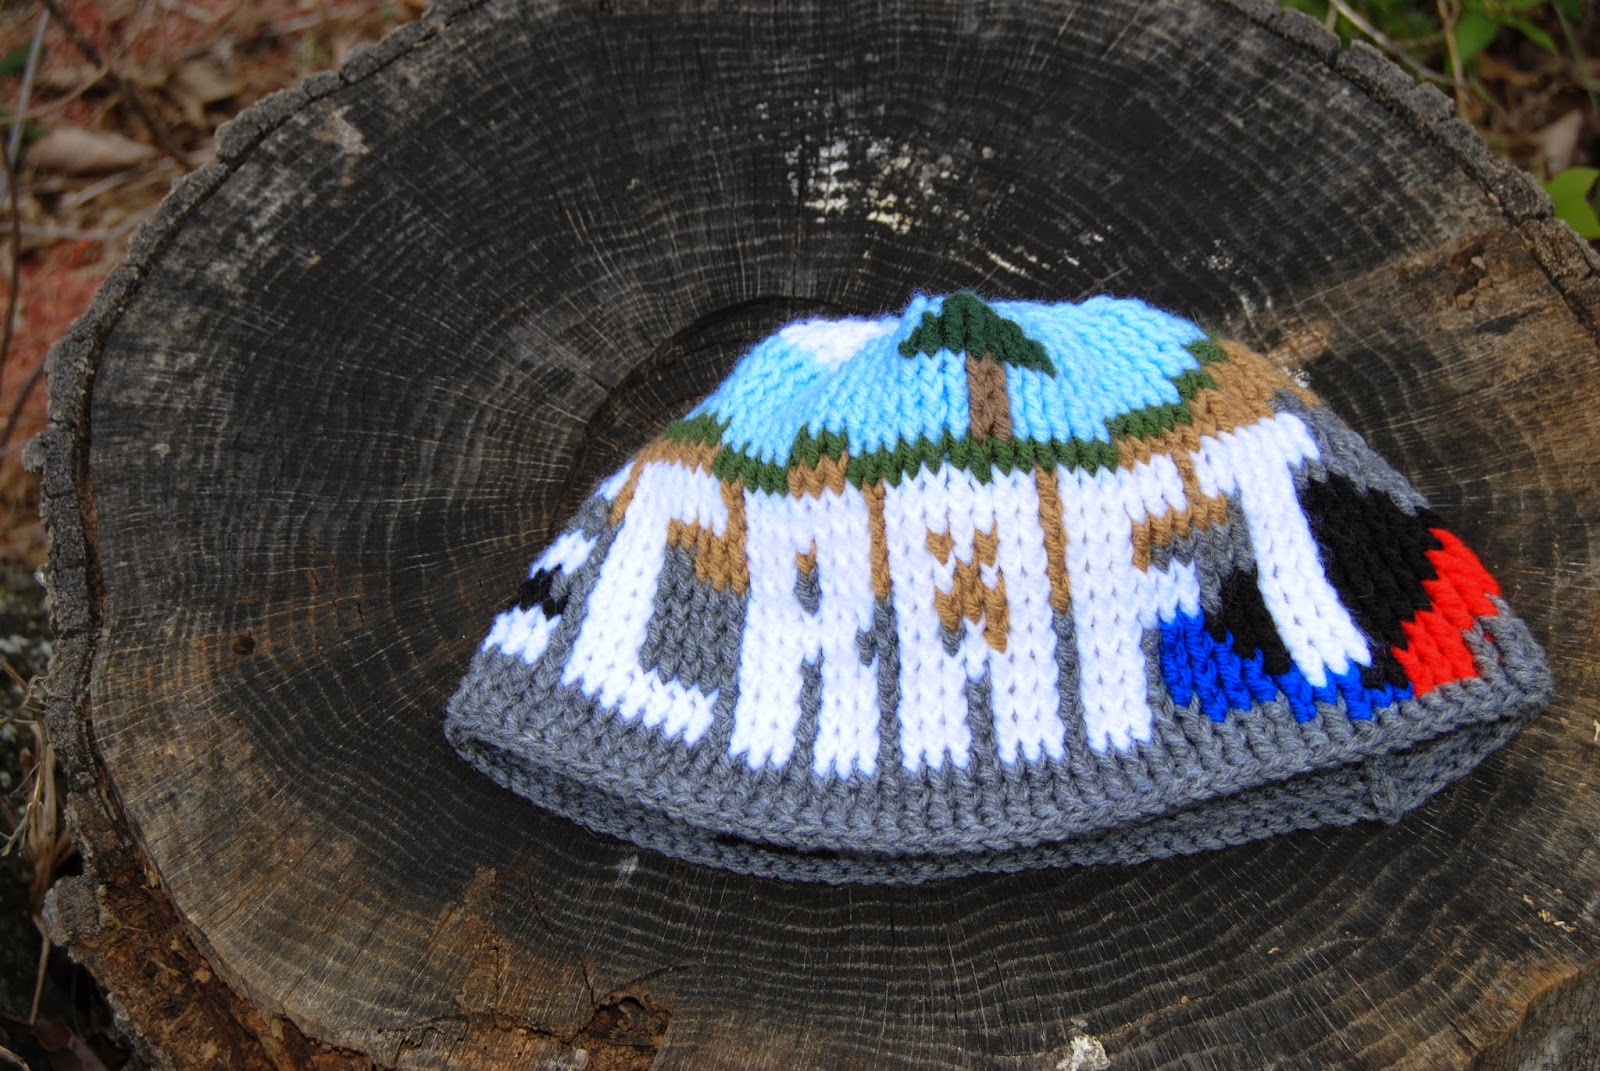
Storenvy Crochet Pattern - Minecraft Logo Hat


Little Wonderland's Minecraft Logo Hat is now available as a pattern!

If you have any questions, please feel free to ask! Also, if you're not a big crocheter but would like to purchase this item, you can purchase it made just for you at my Storenvy shop.

If you're interested in more patterns, I have several for sale through my Etsy shop and even a few geeky patterns at my Storenvy shop.
read more "Storenvy Crochet Pattern - Minecraft Logo Hat"

Monday, February 16, 2015

Etsy Crochet Patterns: Braided Cord Hat AND Free Bag Pattern


Little Wonderland's Braided Cord Hat is now available as a pattern!

If you have any questions, please feel free to ask! Also, if you're not a big crocheter but would like to purchase this item, you can purchase it made just for you at my Etsy shop.

If you're interested in more patterns, I have several for sale through my Etsy shop and even a few geeky patterns at my Storenvy shop.

BONUS TIME!

I also have a pattern that matches the Braided Cord Hat that I'm throwing out there for free!


Hook J
ch = chain          dc = double crochet (US)          fptc = front post triple crochet
hdc = half double crochet

  1. Starting with your base color (for example, brown in the pictures above) ch 40
  2. Ch 1 and turn
  3. Put in a marker. Dc down one side of your chain and then the other until you reach your marker.
  4.  Dc x8
  5. Skip 2 + fptc x2 + switch to your accent color + fptc x2 behind previous stitches
  6. Dc x2 + skip 1 + fptc x1 + switch to your accent color + fptc x1 behind previous stitches
  7. Noted as A
    1. dc around + fptc x2 + fptc x2
      1. One set of the above fptc will be in accent color and the other will be in base color.
    2. dc x2 + fptc x1 + fptc x2
      1. One set of the above fptc will be in accent color and the other will be in base color.
  8. Noted as B
    1. dc around + skip 2 + fptc x2 + fptc x2 behind previous stitches
      1. One set of the above fptc will be in accent color and the other will be in base color.
    2. dc x2 + skip 1 + fptc x1 + fptc x1 behind previous stitches
      1. One set of the above fptc will be in accent color and the other will be in base color.
  9. (A + B) x 7 more times
  10. Dc to next corner and then the corner after that.
  11. Start your strap.
    1. ch 90 in your base color
    2. Triple check that your chain is not twisted when you connect it to the other side.
    3. hdc up one side
    4. dc around mouth of bag
    5. hdc down other side of strap
    6. tie off

If you have any questions, please feel free to ask! Also, if you're not a big crocheter but would like to purchase this bag, feel free to submit a custom order to my Etsy shop for it. I'll be more than happy to make it for you!
read more "Etsy Crochet Patterns: Braided Cord Hat AND Free Bag Pattern"

Monday, February 9, 2015

Etsy Crochet Pattern - Valentine's Day Heart Scarf


Little Wonderland's Valentine Heart Scarf is now available as a pattern!

If you have any questions, please feel free to ask! Also, if you're not a big crocheter but would like to purchase this item, you can purchase it made just for you at my Etsy shop.

If you're interested in more patterns, I have several for sale through my Etsy shop and even a few geeky patterns at my Storenvy shop.
read more "Etsy Crochet Pattern - Valentine's Day Heart Scarf "

Monday, February 2, 2015

Storenvy Crochet Pattern: Minecraft Layers Hat


Little Wonderland's Minecraft Layers Hat is now available as a pattern!

If you have any questions, please feel free to ask! Also, if you're not a big crocheter but would like to purchase this item, you can purchase it made just for you at my Storenvy shop.

If you're interested in more patterns, I have several for sale through my Etsy shop and even a few geeky patterns at my Storenvy shop.
read more "Storenvy Crochet Pattern: Minecraft Layers Hat"

Monday, January 26, 2015

Storenvy Crochet Pattern: Gameboy Phone Sleeve


Little Wonderland's Gameboy phone sleeve is now available as a pattern!

If you have any questions, please feel free to ask! Also, if you're not a big crocheter but would like to purchase this item, you can purchase it made just for you at my Storenvy shop.

If you're interested in more patterns, I have several for sale through my Etsy shop and even a few geeky patterns at my Storenvy shop.
read more "Storenvy Crochet Pattern: Gameboy Phone Sleeve"

Monday, January 19, 2015

Storenvy Crochet Pattern: Pokemon Phone Sleeve


Another new pattern is available through my Storenvy shop! This Pokeball phone sleeve always brings smiles to gamers' faces and can be made in any Pokeball color! Check out the pattern here.

If you have any questions, please feel free to ask! Also, if you're not a big crocheter but would like to purchase this item, you can purchase it made just for you at my Storenvy shop.

If you're interested in more patterns, I have several for sale through my Etsy shop and even a few at my Storenvy shop.
read more "Storenvy Crochet Pattern: Pokemon Phone Sleeve"

Monday, January 12, 2015

Storenvy Crochet Patterns: Dirt and Diamond Minecraft Block


I've released two new patterns onto my Storenvy shop! These Minecraft cubes are some of my favorite items I've made and are always a huge hit at parties with my gamer friends! More to come, too!

Minecraft Dirt Block Pattern
Minecraft Diamond Ore Block Pattern

If you have any questions, please feel free to ask! Also, if you're not a big crocheter but would like to purchase these items, check out the dirt block and diamond ore block on my Storenvy shop!

If you're interested in more patterns, I have several for sale through my Etsy shop and even a few at my Storenvy shop.
read more "Storenvy Crochet Patterns: Dirt and Diamond Minecraft Block"

Monday, January 5, 2015

Free Crochet Pattern: Fat Panda Amigurumi


Did my fingers slip? Oh, no? Another free pattern!

I created the fat panda when the baby of the family (Who is about ten now! When did that happen?) asked for a crochet panda for Christmas. I couldn't find any patterns that I 100% loved so I decided to whip up my own. If nothing else, it's a good starting point for anyone to get creative with their own patterns!


Hook F

sc = single crochet          ch = chain          ss = slip stitch          dec = decrease
dc = double crochet
  • Body
    1. Start with white yarn and make a magic circle with ch2 and 7 sc.
    2. Ch 2 and ss (do this between every round)
    3. Crochet two sc in each stitch around
    4. (Crochet two sc in one stitch and then one sc in the next two stitches)*. Repeat * around. 
    5. (Crochet two sc in one stitch and then one sc in the next three stitches)*. Repeat * around.
    6. Sc around for four rows. 
    7. Switch to black. 
    8. Sc around. 
    9. (Crochet two sc in one stitch and then one sc in the next three stitches)*. Repeat * around. 
    10. Sc around for two rows.
    11. Switch back to white. 
    12. Sc around for seven rows.
    13. Stuff with polyfil or beanbag stuffing. 
    14. (Sc in the next three stitches and then dec)*. Repeat * around for two rows. 
    15. (Sc in the next two stitches and then dec)*. Repeat * around. 
    16. (Sc in the next stitch and then dec)*. Repeat * around. 
    17. Dec around and then do the perfect close for amigurumi.
  • Arms
    1. I personally created the arms by beginning on the body and crocheting to the tips.
    2. Start with black.
    3. Sc into circle of 10 stitches.
    4. Sc around twice.
    5. Dec around and then close
  • Ears
    1. Begin crocheting on the head with black. 
    2. Sc four in a line on the head.
    3. Ch 1 and turn. 
    4. Dc four and tie off to bottom thread, and then pull thread into head. 
  • Feet
    1. Crochet onto body with black.
    2. Sc into circle of 15 stitches. 
    3. Sc around.
    4. Dec around and then close
  •  Using a yarn needle, stitch your facial features onto your fat panda!
If you have any questions, please feel free to ask! Also, if you're not a big crocheter but would like to purchase a fat panda, feel free to submit a custom order to my Etsy shop for it. I'll be more than happy to make it for you!

If you're interested in more patterns, I have several for sale through my Etsy shop.  
read more "Free Crochet Pattern: Fat Panda Amigurumi "

Monday, December 29, 2014

Free Crochet Converse Pattern


I guess this Christmas season has me in the giving spirit! Here's another free pattern!!! These crochet Converse have been gracing my shop on and off for a year now, but I've grown tired of them and will be retiring them soon. So, here they are free for you!


Hook G

ss= slip stitch          ch= chain          hdc= half double crochet          dec= decrease         
fpdc= front post double crochet          sc= single crochet

  1. Start with white (or whatever color you're using for the sole and toe part of the shoe) and chain 3, attach at first chain with ss to create a circle. 
  2. Hdc through the circle ten times. 
  3. Crochet (two hdc in one stitch followed by one hdc in the next stitch)*. Repeat * around. 
  4. Crochet one hdc in each stitch around except for three sets of two hdc per stitch at opposite poles to create an oval shape. Placing markers at these poles will help to keep your stitching clean and organized. You will be using these poles on a later step, also.
    1. for sizes 5 and 6, do this once
    2. for sizes 7 and 8, do this twice
    3. for size 9 and 10, do this three times
  5. Hdc around four times
  6. Ch 1 and turn
  7. Hdc to opposite pole with ch1 and turn at ends.
    1. Do this 13 times for size 5. 
    2. 14 times for size 6.
    3. 15 times for size 7.
    4. 16 times for size 8.
    5. 17 times for size 9. 
    6. 18 times for size 10. 
  8.  Hdc to the center of the poles and (dec twice followed by one hdc)*. Repeat * to end of round. 
    1. Repeat this six times. Do not crochet stitches at beginning and end of the last row.
  9. Switch to the color you want your Converse to be. 
  10. Skip one and hdc around (skip one at corner of heel).
  11. Switch back to white (or whatever color you're using for the sole and toe part of the shoe) with a ss.
  12. Ch 2 and hdc to the toe cap. Attach to the toe cap with a fpdc.
  13. Switch to your color and hdc to other side of toe cap. 
  14. Switch back to white, or equivalent, and fpdc once to toe cap. Then hdc until you reach your ch 2 from #12. 
  15. Switch to your color and ss in 2nd chain in ch 2.
  16. Hdc to first corner of toe cap, dec across toe cap, hdc around, and then ss in the 2nd chain of ch 2, then ch 2. Repeat this two more times. 
  17. Hdc around and ss in 2nd chain of ch 2, then tie off.
  18. For the tongue:
    1. Go one row up from your white toe cap and use color to sc from one st away from white line to opposite side. 
    2. Ch 1 and turn and sc across. Repeat this nine more times.
      1. On the last row, ss the corners onto the body of the slipper. 
    3. Tie off. 
  19. For laces: ch 85. 

If you have any questions, please feel free to ask! Also, if you're not a big crocheter but would like to purchase these slippers, purchase them here or if they've left my shop feel free to submit a custom order to my Etsy shop for it. I'll be more than happy to make it for you!

If you're interested in more patterns, I have several for sale through my Etsy shop
read more "Free Crochet Converse Pattern"

Monday, December 22, 2014

Free Dinosaur Bag Pattern


Today holds a free pattern! I sold this item on Etsy for a little while and even carried around the bag myself for a few months. It received lots of compliments and lots of "favorites" but I felt that it didn't quite fit in my shop. I still love it and I feel like others will, too. So here it is! Free!

Hook G
Colors used in original item: Black by Red Heart Yarn (will be marked as A), Grey Heather by Red Heart Yarn (will be marked as B), Medium Thyme by Red Heart Yarn (will be marked as C), Dark Sage by Red Heart Yarn (will be marked as D), White by Red Heart Yarn (will be marked as E).

  • Row 1: In C, ch 35 and hdc across, ch 1 and turn (do this between each row unless noted otherwise)
  • Row 2-3: hdc across
  • Row 4-28: Switch to A and hdc across
  • Row 29-78: hdc across, connecting the sides with the previous section to create the back
    • to connect the back by (at the end of your row) slip stitch into the equivalent of the back and then slip stitch into the row above, turn, and crochet the next row. You start this by slip stitching your yarn into the row below the one you just created, and then slip stitch in the row below that one. If this description is too confusing, leave a comment below and I will create an entire post dedicated to a tutorial on this method.
  • Row 79-82: hdc across (no more connecting to the back)
  • Row 83: 
    • hdc x10
    • B + hdc x6
    • A + hdc x3
    • B + hdc x6
    • A + hdc x11
  • Row 84:
    • hdc x10
    • B + hdc x1
    • C + hdc x6
    • B + hdc x1
    • A + hdc x1
    • B + hdc x1
    • C + hdc x6
    • B + hdc x1
    • A + hdc x8
  • Row 85:
    • hdc x7
    • B + hdc x1
    • C + hdc x7
    • B + hdc x3
    • C + hdc x7
    • B + hdc x1
    • A + hdc x9
  • Row 86:
    • hdc x7
    • B + hdc x3
    • C + hdc x2
    • B + hdc x1
    • D + hdc x4
    • C + hdc x3
    • D + hdc x4
    • B + hdc x1
    • C + hdc x2
    • B + hdc x3
    • A + hdc x5
  • Row 87:
    • hdc x5
    • B + hdc x1
    • C + hdc x3
    • D + hdc x1
    • B + hdc x2
    • D + hdc x10
    • B + hdc x2
    • D + hdc x1
    • C + hdc x3
    • B + hdc x1
    • A + hdc x6
  • Row 88:
    • hdc x7
    • B + hdc x1
    • C + hdc x1
    • D + hdc x3
    • B + hdc x3
    • D + hdc x7
    • B + hdc x3
    • D + hdc x3
    • C + hdc x1
    • B + hdc x1
    • A + hdc x5
  • Row 89:
    • hdc x5
    • B + hdc x1
    • C + hdc x1
    • D + hdc x3
    • B + hdc x4
    • D + hdc x6
    • B + hdc x4
    • D + hdc x3
    • C + hdc x1
    • B + hdc x1
    • A + hdc x6
  • Row 90:
    • hdc x7
    • B + hdc x1
    • C + hdc x1
    • D + hdc x3
    • C + hdc x1
    • B + hdc x4
    • D + hdc x3
    • B + hdc x4
    • C + hdc x1
    • D + hdc x3
    • C + hdc x1
    • B + hdc x1
    • A + hdc x5
  • Row 91:
    • hdc x5
    • B + hdc x1
    • C + hdc x1
    • D + hdc x4
    • C + hdc x2
    • D + hdc x8
    • C + hdc x2
    • D + hdc x4
    • C + hdc x1
    • B + hdc x1
    • A + hdc x6
  • Row 92:
    • hdc x6
    • B + hdc x1
    • C + hdc x2
    • D + hdc x19
    • C + hdc x2
    • B + hdc x1
    • A + hdc x4
  • Row 93:
    • hdc x4
    • B + hdc x1
    • C + hdc x2
    • D + hdc x3
    • E + hdc x4
    • D + hdc x3
    • E + hdc x5
    • D + hdc x4
    • C + hdc x2
    • B + hdc x1
    • A + hdc x5
  • Row 94:
    • hdc x6
    • B + hdc x1
    • C + hdc x2
    • D + hdc x3
    • E + hdc x2
    • A + hdc x2
    • E + hdc x1
    • D + hdc x3
    • E + hdc x1
    • A + hdc x2
    • E + hdc x2
    • D + hdc x3
    • C + hdc x2
    • B + hdc x1
    • A + hdc x4
  • Row 95:
    • hdc x5
    • B + hdc x1
    • C + hdc x2
    • D + hdc x2
    • E + hdc x5
    • D + hdc x3
    • E + hdc x5
    • D + hdc x3
    • C + hdc x2
    • B + hdc x1
    • A + hdc x6
  • Row 96:
    • hdc x7
    • B + hdc x1
    • C + hdc x1
    • D + hdc x8
    • B + hdc x2
    • D + hdc x9
    • C + hdc x1
    • B + hdc x1
    • A + hdc x5
  • Row 97:
    • hdc x6
    • B + hdc x1
    • C + hdc x3
    • D + hdc x6
    • B + hdc x3
    • D + hdc x5
    • C + hdc x3
    • B + hdc x1
    • A + hdc x7
  • Row 98:
    • hdc x7
    • B + hdc x1
    • C + hdc x5
    • D + hdc x3
    • B + hdc x3
    • D + hdc x4
    • C + hdc x5
    • B + hdc x1
    • A + hdc x6
  • Row 99:
    • hdc x5
    • B + hdc x5
    • C + hdc x2
    • D + hdc x10
    • C + hdc x2
    • B + hdc x5
    • A + hdc x6
  • Row 100:
    • hdc x11
    • B + hdc x2
    • C + hdc x2
    • D + hdc x6
    • C + hdc x2
    • B + hdc x2
    • A + hdc x10
  • Row 101:
    • hdc x11
    • B + hdc x2
    • C + hdc x9
    • B + hdc x2
    • A + hdc x11
  • Row 102:
    • hdc x12
    • B + hdc x11
    • A + hdc x12
  • Row 103-106: hdc across and then tie off. 
 For the strap, slip stitch your yarn onto the top of your bag, chain to your desired length, slip stitch to the other side of the top of your bag. Then double crochet down one side of your strap and then the other.

I sew a fabric lining into the inside of my bag. This will prevent excess stretching as well as the dreaded pen poking out and escaping from your purse.

If you have any questions, please feel free to ask! Also, if you're not a big crocheter but would like to purchase this bag, feel free to submit a custom order to my Etsy shop for it. I'll be more than happy to make it for you! 

If you're interested in more patterns, I have several for sale through my Etsy shop.  Including one similar to this except with an adorable owl!
read more "Free Dinosaur Bag Pattern"

Monday, December 8, 2014

Monday, December 1, 2014

Crochet Pattern: Mario Mushroom Coin Purse


Are you like me and when you look at something you say "I can make that!"

Well now any crocheters can save a few bucks and have some fun with my Mario Mushroom Coin Purse crochet pattern!!!

Find it on Storenvy.

But that's not all! (Yes, I'm pulling my radio announcer voice.)

The pattern for my "Psychedelic" Mushroom Coin Purse is going up on Etsy, too! They're the same pattern, so if you're more comfortable with buying from Etsy you can find it there.


read more "Crochet Pattern: Mario Mushroom Coin Purse"

Sunday, November 30, 2014

Broke Girl's Guide to Christmas Decor


The Thanksgiving feast has now been digested and it's officially publicly acceptable to start decorating for Christmas. Since this is our first Christmas in our new home (and really the first Christmas I've been able to decorate for) I'm finding myself in quite the Christmas spirit!

I decided to go simple with my wreath, and chose a design that would work all winter long. I had some silver and white spray painted sticks from a previous project and I bound them with baby blue yarn.


Even my kitchen has a tiny bit of festivity! I switched out my chalkboard art to fit the season. I also went green and recycled a toilet paper roll into this sweet little Rudolph. The tutorial is not in English, but it has an amazing picture tutorial.


I also had an amazing Goodwill find of this 8 bit snowman mug! I filled it with candy canes and sat in on my kitchen counter.


Down the blank wall next to the front door, I hung our stockings (with care) that I made a few years ago from Goodwill sweaters. I switched out my leaves for pine needles. For my window bunting I crocheted the most adorable vintage lights. I had not idea what to do for the centerpiece of my wall so I just wrapped a scarf around a foam wreath frame and tied a bit of sheer ribbon to the top. It's not great, but it'll hold the place until I think of something better...It takes time to build an arsenal after all! I decided to test the cats (because the tree isn't temptation enough) and put harder things in the windowsill other than crochet items. I found some adorable tins, including the amazing Hershey General Store one, at Goodwill. I also found the stained glass Santa, wooden snow flake bucket, and the silver star bucket, the last two I stuffed with my crochet pine cones, from Goodwill! It is amazing what you can find there...like a Christmas tree!!! That's right, my Christmas tree (artificial with real lights wrapped around it) came from Goodwill. $35 for lights and all!


I topped my tree with a crochet Santa hat that I had laying around from the shop.  We bought a pack of twelve ball ornaments from Dollar Tree to add a bit of shine...which Mischief then knocked off the tree and chased around the house. The hubs and I made cinnamon ornaments too! There are even paw prints for each of the cats. I picked up some clear ornaments from Marshall's and filled one with sand and shells from our honeymoon and another with the decorative flowers from our wedding cake. We also have sand from the exact spot on the beach where the hubs proposed, but we have to track it down before we can put it in an ornament. Somewhere on the tree is also the key from Jesse's bachelor pad. It can be funny to look at our tree sometimes. Only the front third or less is decorated and everything else is completely bare! We know that as time goes on we'll collect more ornaments, so we're trying not to invest in too much meaningless filler right now.


Above our bed, I replaced the silhouette with a snowflake on top of green paper. Across from our bed I hung up a wreath made from coffee filters, if you'd believe it, and tossed up a tiny Christmas tree I made a few years ago. I wish I had thought to write down a tutorial for it! It's pretty simple, though. I rolled a paper plate into a cone, wrapped yarn around it, used a punch on paint chips for the ornaments and lights, and used thread for the string on the lights.


Even my bathroom caught the spirit. When I started planning what I wanted my first home to look like, I always pictured a blue living room. So, when I started buying Christmas things a few years ago, I opted for a lot of blue decorations. Then, we moved into our new home and the walls in the living room were a perfect milk-chocolate shade and we had red and green shade. Red and green. Traditional Christmas colors. That definitely put a kink in my "blue Christmas". However, I've been planning to redecorate my bathroom to have a beach theme. Beaches have blue, right? So I threw up my blue decorations in there! You can't tell from the picture, but that blue bottle is tall.  It's almost as long as my arm! The stick perched inside is spray painted black with silver and blue tinsel. I also hung baby blue crochet snowflakes along the top of the window.


I still have a little bit more to do, like a tree skirt. All of this hard work I've put in, however, will not save me from the headache of cats. I think I mentioned earlier that the Christmas tree has been a bit tempting for the cats?

Mischief is living up to her name. She pulled down the tree and cuddled up under it!
read more "Broke Girl's Guide to Christmas Decor"

Monday, November 17, 2014

Make-It-Mondy: Zelda Hat

Ever since I listed my long elf hat, I've been waiting for the day that someone requested a custom Legend of Zelda hat. Well, it finally happened! The customer picked out the exact yarn colors she liked, I ordered them, and then I put it all together in this wonderful hat! Thank you to my beautiful customer for sending me these pictures of her modeling it.


read more "Make-It-Mondy: Zelda Hat"

Friday, November 14, 2014

Broke Girl's Guide to Autumn Decorations


Halloween, my favorite holiday, has ended and now I must take all my decorations down and transition to an autumn theme. I use my Halloween decorations, as seen in Broke Girl's Guide to Halloween, as a basis to make for easy changes.

I kept the same wreath outside. I moved the witch's broom to the garden and took the tentacles out of the moss and put them into my storage bin for next year (see what I'm talking about here).


I exchanged my Halloween chalkboard art on my fridge for an autumn themed one, from Nest of Posies. Next to my front door, there's this long, thin wall that is simply too empty. I had an idea of crocheting a skinny wall hanging. I'm not sure if I like it, but it will do until time for Christmas decorations to go up.

I exchanged my Halloween silhouettes for rustic framed leaves


My Halloween printable that was framed between my two windows has been switched out for a paper wreath in autumn colors.


The pom-pom garland that was inspired by My Fabuless Life was replaced by paper leaves inspired by Money Saving Mom.


My windowsills had to remain cat friendly, so my zombie brains became pine cones.They can't break these!


For our entertainment center, I filled up the area between our Xbox and Playstation with yarn wrapped bottles. I'm planning on switching these out for different colors year-round.


Isn't it all so cute! The best part is that I spent NO MONEY! This was all from things I could find around the house or free off the internet. If I keep adding to my decoration stash every year than I'll have a perfect arsenal by the time I have children.


Now to start plotting for Christmas...


read more "Broke Girl's Guide to Autumn Decorations "